If you would like to take class attendance with QR codes, read on!
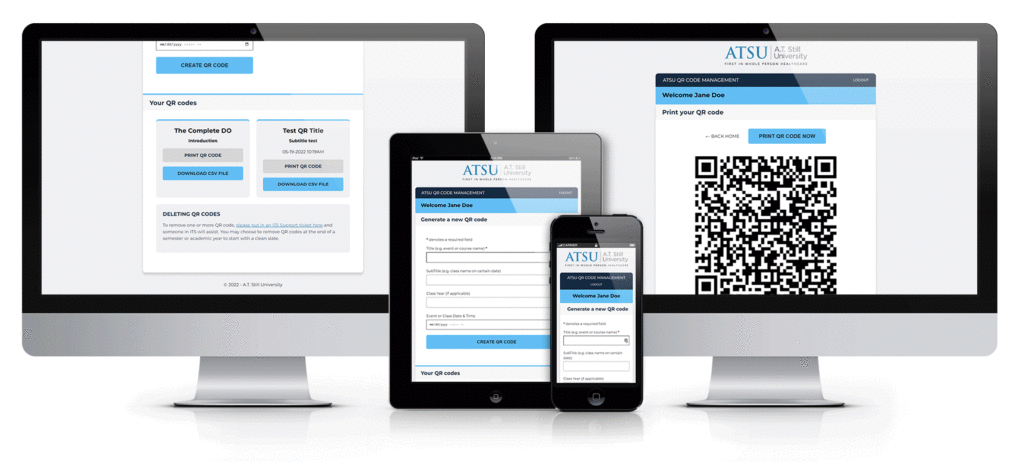
ATSU-ITS has developed the QR Code Manager that lets faculty & staff create and print QR codes and allows ATSU users to scan them from the ATSU Go mobile app (iOS | Android). You can find the QR Code Manager in the ATSU Portal from Resources > My Tools.
The primary use case is to take attendance but can also be used for a number of other internal activities:
- Attendance (primary use case)
- Student organization events
- Professor office hours (create a new QR code for this per semester or academic year)
- Required appointments with departmental staff (e.g. Learning Resources & Accommodation Services)
- Required commencement activities for graduates (a different QR code for each activity they are required to do in person before commencement day)
- Internal events such as hospital day, where you simply want a record of who attended and to see attendees school/program/class year
- and more…
Note: This is not an event ticketing solution
While this tool works great for tracking attendance, it would not be a great tool for an event where you are selling tickets and need each participant to have their own unique QR code that proves they purchased a ticket. For event ticketing and registration portals on Eventbrite, please contact communications[at]atsu.edu
How it works
- Browse to the QR Code Manager from the ATSU Portal (Resources > My Tools).
- Create a new QR code by filling out the form fields.
(Note that only a title is required. Be sure you fill in enough details that you can distinguish your QR code from others at a later date.) - Print your QR code and post it in a location for students or event attendees to scan.
(Note, the person scanning a QR code must have the ATSU GO app installed and a valid ATSU account) - Ask your students or event attendees to download the ATSU Go mobile app (iOS | Android)
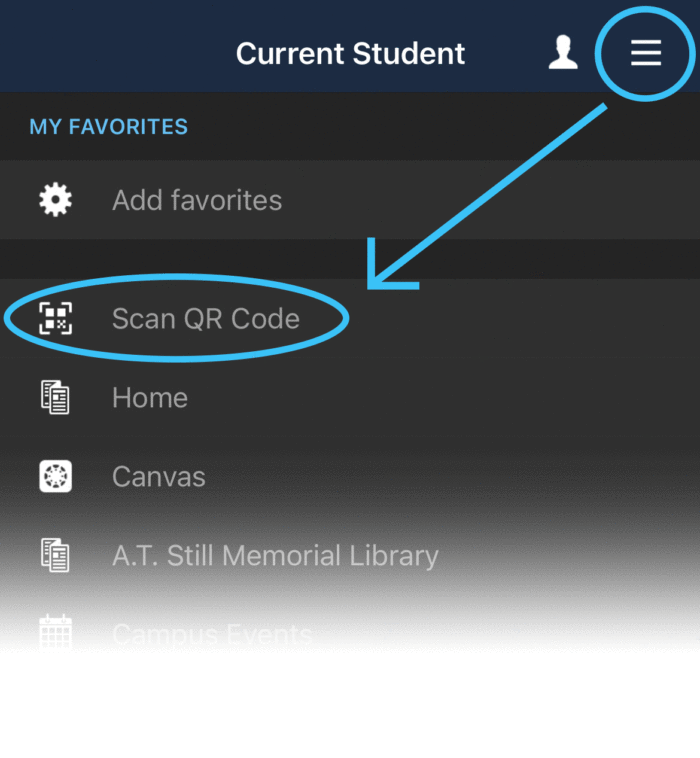
- Users will select the Scan QR Code menu item from the app’s top, right, navigation menu (see screenshot below)
(Note, Using ATSU GO > Scan QR Code is required. Scanning these ATSU QR codes with the native camera app will not work and the QR scan will not be recorded)

See who attended
- After QR scans have been completed, log back in to the QR Code Manager.
- Scroll down to ‘Your QR Codes’ and select the button for ‘Download CSV File.’
- Review your CSV file to see the attendee’s first/last name, email, student ID, check-in date/time; plus the attendee’s school, program, and class year.
Let’s discuss
If you would like to get started using QR codes, ATSU-ITS Development staff would be glad to walk through things further and answer any questions you have. Create a ticket today. Use category “Website & Mobile App Issues” and subcategory “QR Code Manager.”
